
Table of Contents

Few home maintenance frustrations match the feeling of pushing a vacuum cleaner back and forth across a rug only to realize it is leaving behind the very dirt, pet hair, and debris it was built to collect. When you notice your vacuum losing suction, cleaning sessions take twice as long and produce half the results. You might hear the motor running at full pitch, yet the machine simply pushes dust bunnies around or fails to pull carpet fibers up standardly.
The good news is that a drop in airflow rarely means your machine is ready for the landfill. In most instances, a vVACUUM SERVICEacuum losing suction is the result of routine wear, blocked passages, or overdue maintenance components like filters and bags. By following a systematic troubleshooting process, you can isolate the bottleneck, clean out standard blockages, and restore your unit’s pulling power.
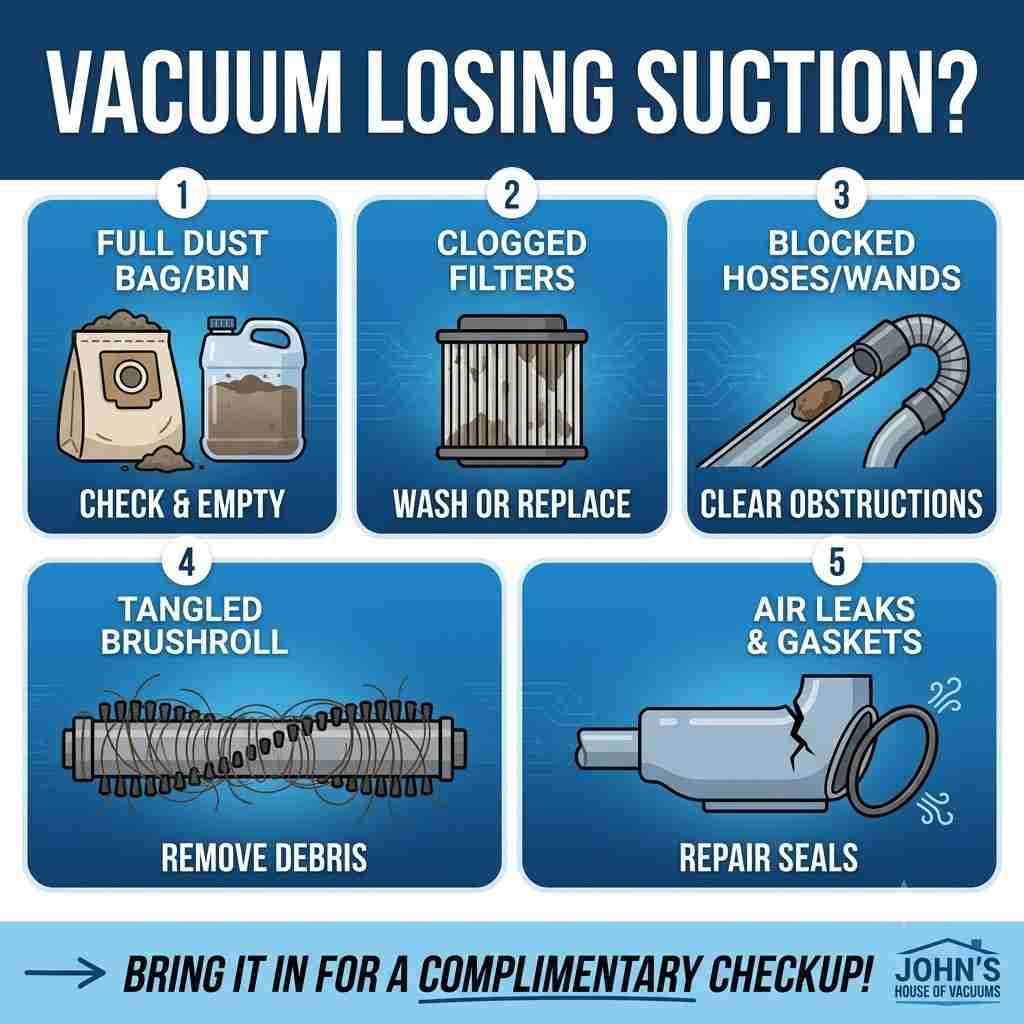
Below, we break down the five most common reasons behind airflow failure, how to fix them at home, and when it makes sense to let a professional step in. If you run through these checks and your machine still struggles, bring it by to see Patric at John’s House of Vacuums for a complimentary checkup. Our team in Kennett Square will inspect your machine from top to bottom, pinpoint airflow bottlenecks, and get your unit running like new again.
1. The Dust Bag or Canister Is Full
The most frequent culprit behind a vacuum losing suction is an overfilled dust container. Whether your machine utilizes disposable paper filter bags or a bagless cyclone bin, airflow relies entirely on having open space to travel.
How Bagged and Bagless Systems Suffer
In a bagged model, air passes directly through the microscopic pores of the paper or synthetic bag material. As dirt fills the bag, those pores gradually clog. If you wait until the bag is packed tight before changing it, air can no longer pass through the fabric freely. The motor works harder, heat builds up, and suction drops dramatically.
Bagless vacuums rely on cyclonic separation to throw dirt outward while allowing clean air to exhaust through the center filters. When the plastic dust cup fills past the max-fill line, debris begins swirling into the filter chambers, suffocating airflow at the core of the cyclone.
Actionable Home Fixes
- For Bagged Vacuums: Check the bag density. If it feels firm or full to the touch, replace it immediately—even if the bag full indicator light hasn’t turned on. Always use high-quality, manufacturer-recommended replacement bags to protect the motor.
- For Bagless Vacuums: Empty the bin after every major cleaning session. Never allow dirt to settle above the designated maximum capacity line. Periodically wipe out the interior cyclone shroud with a damp cloth to clear fine dust buildup.
Pro Tip from Patric: If you replace the bag or empty the bin and still experience a vacuum losing suction, fine dust may have caked the inner airways. Stop into John’s House of Vacuums for a free checkup. Patric can check your gaskets and internal seals to ensure complete vacuum pressure.
2. Blocked or Clogged Filters
If your dust container is empty but you are still dealing with a vacuum losing suction, the filters are almost certainly loaded with fine particles. Modern vacuum cleaners use multiple filtration stages—typically a pre-motor filter to protect the motor impeller and a post-motor HEPA filter to catch microscopic allergens before exhaust air enters your room.
Airflow Path:
[Floor Nozzle] ➔ [Hose / Wand] ➔ [Pre-Motor Filter] ➔ [Motor] ➔ [Post-Motor HEPA Filter] ➔ [Exhaust]
                                       ▲
                         (Frequent Blockage Point!)
When fine dust, drywall powder, baking soda, or pet dander coat these filter surfaces, air velocity plummets.
How to Inspect and Clean Filters
- Locate the Pre-Motor Filter: This filter is usually positioned directly beneath the dust cup or behind the bag compartment. Pull it out and inspect it under bright light. If it looks grey, caked, or dark, airflow is severely restricted.
- Determine Washability: Check your owner’s manual or the markings on the filter frame. Foam and plastic-framed felt filters are often washable, whereas paper or specialized HEPA filters must be replaced dry.
- Wash Correctly: Rinse washable filters under cold, running water without soap until the water runs clear. Gently squeeze out excess moisture.
- Dry Completely: Allow filters to air dry for at least 24 to 48 hours before reinstallation. Installing a damp filter into your machine can ruin the motor and cause mildew inside the housing.
When to Replace Filters
Washable filters do not last forever. Over months of use, microscopic pores become permanently choked with embedded soot and dust. If your washable filter remains discolored after rinsing, or if you use non-washable HEPA media, replacement is essential.
If you are unsure which filter fits your specific model, bring your unit or current filters to Patric at John’s House of Vacuums. We carry a complete inventory of genuine filters for SEBO, Miele, Riccar, Dyson, Shark, Hoover, and Eureka models, and Patric will inspect your filter housing free of charge.
3. Clogged Hoses, Wands, and Attachment Channels
A physical blockage inside the air pathway is a classic reason for a vacuum losing suction. It takes only one small object—a coin, a rogue hair clip, a sock, or a clump of pine needles—to catch inside a bend in the hose. Once an initial object lodges inside, fine dirt and hair accumulate around it, forming a dense plug that stops suction cold.
How to Clear a Hose Blockage
- Detach the Hose: Disconnect the flexible hose from both the vacuum body and the wand handle.
- Perform the Visual Check: Look down the tube toward a bright light source. If you cannot see light through the other end, a obstruction is present.
- Locate the Obstruction: Squeeze gently along the length of a soft hose. A hard or rigid spot indicates where the debris has collected.
- Clear the Passage: Never use sharp wire coat hangers, as they can puncture flexible rubber or coil interior lining. Instead, use a long wooden broom handle or specialized flexible tubing brush to gently push the clog through the far end.
Clearing a Hose Clog:
[Broom Handle] ──────────────────► [ Flexible Hose ] ──► (Pushes Clog Out)
Inspecting Internal Air Passages
Blockages do not only happen in the main hose. They frequently occur in the lower transition hose—the small, corrugated tube connecting the floor nozzle base to the wand inlet. Turn your vacuum over and inspect this short elbow piece. Hair and small carpet fibers often lodge right at this bend.
If you have tried probing the hose and still face a stubborn obstruction, don’t risk tearing your vacuum assembly. Bring your machine into John’s House of Vacuums. Patric has specialized long-reach extraction tools to clear stubborn clogs safely without damaging internal hoses or electrical wiring.
4. Brushroll Obstructions and Broken Belts
While suction pulls air into the machine, the agitator brushroll is responsible for beating carpet fibers to release deeply embedded dirt. When the brushroll stops spinning or becomes bound by hair, the machine cannot sweep material into the suction channel, creating the illusion of a vacuum losing suction.
Inspecting the Brushroll Assembly
Turn the vacuum over and examine the wooden or plastic roller underneath the floor head:
- Hair and Thread Wrap: Long human hair, pet fur, carpet strings, and dental floss tend to wrap tightly around the agitator bar. Over time, this binding friction slows down rotation speed and puts massive mechanical strain on the drive motor.
- Bearing Buildup: Hair can migrate into the end caps and bearings of the brushroll. When bearings seize, the brushroll stops turning entirely.
- Bristle Wear: Check the length and stiffness of the bristles. If the bristles are soft, worn flat, or no longer extend past the bottom plate of the nozzle, they cannot agitate carpet fibers to lift debris toward the vacuum intake.
How to Clean and Maintain the Agitator
Use a pair of seam rippers or small scissors to carefully slice through wrapped hair along the designated groove on the brushroll. Pull away tangled debris, taking care not to snip the bristle tufts. Clear away any wound thread near the side bearings.
Checking the Drive Belt
On non-direct-drive models, a rubber belt connects the motor shaft to the brushroll. Inspect this belt for:
- Stretching or loose tension.
- Cracking, fraying, or missing teeth.
- Smooth, melted spots caused by friction jams.
A loose or stretched belt slips during operation, drastically reducing brushroll power and dirt pickup. Replacing rubber drive belts every 6 to 12 months restores optimal sweeping performance.
If replacing belts or untangling hair seems messy, or if your brushroll motor is making unusual grinding noises, let Patric take a look. Bring your floor head to John’s House of Vacuums for a quick checkup, and we will ensure your agitator and belt assembly are properly aligned and tensioned.
5. Cracks, Air Leaks, and Bad Gaskets
Suction relies on a completely sealed vacuum chamber. Even a microscopic break in the sealed air path reduces the pressure differential needed to pull heavy debris off the floor. When ambient room air leaks into the vacuum stream before reaching the floor nozzle, you end up with a vacuum losing suction at the base.
Common Sources of Air Leaks
| Leak Location | Cause | Symptoms |
| Flexible Hose | Cracks, pinholes, or tears from over-stretching. | Whistling sound; suction felt at hose handle but weak at floor tool. |
| Connection Points | Loose push-fit wands or broken plastic locking tabs. | Wand wobbles; air hissed out at connection joints. |
| Rubber Gaskets | Worn, cracked, or missing rubber seals around dust cups or bag doors. | Loss of seal when dust cup latches; fine dust blowing near door seams. |
| Floor Base Plate | Warped plastic frames, missing seal strips, or cracked lower housings. | Vacuum works on hard floors but fails entirely on high-pile carpet. |
Testing for Air Leaks at Home
To identify hidden air leaks, turn your vacuum on and run your hand along the hose, connection cuffs, and filter door edges. Listen closely for high-pitched whistling sounds or feel for escaping drafts. You can also test suction strength directly at different points:
- Test suction directly at the motor inlet or bag chamber opening.
- Test suction at the end of the flexible hose.
- Test suction at the end of the wand and floor head.
If suction is strong at the motor but weak at the floor base, air is escaping somewhere along the line.
While small tears in a hose can occasionally be patched temporarily with electrical tape, taped repairs rarely hold under operational pressure. Replacing cracked hoses, worn latches, or aged perimeter gaskets is the only permanent solution for restoring peak vacuum performance.
Preventative Maintenance: Keeping Your Vacuum at Peak Suction
Preventing a vacuum losing suction down the road comes down to consistent maintenance habits. By following a basic care routine, you protect internal components, prevent motor overheating, and extend the lifespan of your machine for years to come.
Monthly Vacuum Care Checklist:
 [ ] Check and empty dust bin / replace bag before 3/4 full
 [ ] Inspect pre-motor and post-motor filters for dust cake
 [ ] Remove hair and string wrapped around brushroll
 [ ] Examine hose length for small tears or hidden blockages
 [ ] Wipe down interior seals and rubber gaskets
Essential Habits for Homeowners
- Never Vacuum Fine Construction Dust or Liquids: Standard residential vacuums are not designed for dry-wall dust, plaster powder, fireplace ash, or water. Fine powders instantly blind motor filters, while moisture creates mud inside the internal passages, leading to severe air blockage and mold growth.
- Store Hoses Properly: Avoid wrapping flexible hoses tightly around storage hooks. Over-stretching or crimping hoses causes internal wire coils to snap and rubber sleeves to tear prematurely.
- Listen to Motor Pitch Changes: A sudden increase in motor pitch (a high-pitched whining sound) indicates that the motor is starved for air. Turn off the machine immediately to prevent thermal overload and check for clogs.
Why Professional Service Makes All the Difference
While basic troubleshooting can fix straightforward clogs and dirty filters, complex vacuum systems—especially high-end uprights and canisters like SEBO, Miele, Riccar, and Dyson—contain intricate internal bypass valves, secondary safety filters, and sealed motor housings that require specialized tools to service properly.
Over time, fine dust penetrates past primary filters and settles inside the motor fan housing. This internal buildup causes unbalanced impellers, overheating bearings, and permanent loss of sealed vacuum pressure that basic home cleaning cannot resolve.
What Happens During a Free Checkup at John’s House of Vacuums?
When you bring a vacuum losing suction into our local shop in Kennett Square, Patric performs a thorough diagnostic evaluation:
- Complete Airflow & Pressure Test: We test real-time water-lift suction using professional vacuum gauges to pinpoint exact pressure drops.
- Internal Airway & Fan Inspection: We check internal bypass valves, motor impellers, and concealed motor filters for packed dust or damage.
- Gasket & Seal Diagnostics: We evaluate every rubber gasket, seal ring, and latch mechanism to ensure complete air-tight sealing.
- Electrical & Belt Drive Tuning: We inspect drive belts, brushroll bearings, and wiring connections to verify proper agitation speed and safety.
Instead of guessing what might be wrong or spending money on parts you might not need, let an experienced specialist diagnose the exact issue.
Bring Your Vacuum to Patric at John’s House of Vacuums
If you’ve cleared the bag, washed the filters, and checked the hose, but your machine still struggles on your carpets, don’t give up on your investment or resort to buying a cheap disposable replacement.
Visit John’s House of Vacuums today for a complimentary checkup. Patric will inspect your vacuum cleaner, explain what is causing the loss of power, and outline the exact steps needed to restore factory-level performance—all with zero obligation.
- Address: 305 W. State Street, Kennett Square, PA 19348
- Phone: (484) 732-7956
- Services: Sales, Service, Tune-Ups, Genuine Parts, Bags, Filters & Expert Advice
Whether your machine needs a deep internal clean, a replacement seal, or a simple belt adjustment, Patric at John’s House of Vacuums is here to make sure your vacuum operates flawlessly every time you turn it on!